
A gelato kitchen, a pastry shop and a café can use the same pure pistachio paste in different ways. Grind the pistachios on site, then weigh the paste into your own recipes. You choose the nuts, the roast and the texture. Sugar, chocolate and dairy belong in the recipe you make afterwards.
Start with the flavour you want to serve
For a pistachio gelato, the paste needs to work with the sweetness and dairy in the base. In a chocolate filling, it needs enough flavour to come through the chocolate. For a pastry cream, both flavour and a smooth finish matter.
Choose your pistachios with that finished product in mind. Taste the nuts first, then taste a small batch of paste in your actual recipe. Keep the sample you prefer as your reference for the next batch.
Raw or ready-roasted pistachios?
Set your own roast
Buy shelled, unsalted kernels when you want to roast in your kitchen. A light roast gives you a useful starting point for balancing pistachio flavour and colour. Keep the oven load and tray depth consistent.
Keep preparation shorter
Choose unsalted pistachios with a roast you like. Use the same product specification for repeat batches. Taste each new delivery before making a full batch of paste.
Remove the hard shells completely. The thin skin around the kernel is a separate choice: peeled kernels give a cleaner green appearance, while skins contribute darker flecks. For pale creams and green gelato, peeled pistachios are a practical choice.
Roasting also changes the final colour. Start light, then adjust for the flavour of your dessert. The American Pistachio Growers’ paste guide explains how roasting and kernel skins affect the paste.
From kernels to paste
Give each batch the same route through the kitchen. Prepare clean trays and containers before you start, so the roasted nuts and finished paste move straight to the next stage.
- Sort. Remove shell fragments and any damaged kernels. Weigh the prepared pistachios.
- Roast. Spread raw kernels evenly and use your chosen light roast. Keep the batch size consistent.
- Cool. Spread the roasted kernels on a clean tray and let them cool before grinding.
- Grind. Set the texture for your application and collect the paste in a clean, dry food container.
- Record. Label the batch and note the nuts, roast and texture setting you used.
Grinding releases the pistachios’ own oil and turns the kernels into paste. A pure pistachio paste needs no added sugar or oil. For more on preparation, read our guide to roasting and natural fat content.
Set the texture for the job
For gelato and smooth creams, use a fine paste. Spread a small sample thinly on a spoon or plate to inspect it, then taste it in the finished recipe. This makes it easier to judge both texture and flavour.
For a pastry with a crunchy finish, make the smooth paste first and add chopped pistachios during assembly. You can then control the paste and the pieces separately.
Compare samples at a similar temperature. A warm sample and a cool sample can flow differently, which makes a side-by-side texture comparison less useful.
Weigh the paste into your gelato base
Use the total mix weight when calculating the pistachio percentage. For an 8% trial, weigh 80 g of pure paste and 920 g of the other ingredients to make 1,000 g of finished mix.
Count the paste’s fat and solids when balancing the base. Taste the trial at serving temperature, then adjust your recipe. Record the version you approve so the next batch has the same pistachio level.
Use one paste across your pastry menu
Pastry cream: weigh the paste into your cream recipe and mix until the colour is even. Keep the paste weight fixed when comparing batches.
Chocolate fillings: combine the paste with the chocolate and other ingredients in your filling formula. Judge the result after it has set at the temperature at which you serve it.
Croissants and cakes: use the paste in a prepared filling or cream. Test it in the complete pastry, including baking or chilling, so you judge the texture your customer will eat.
Make the next batch match
A short batch sheet is enough to preserve the decisions that worked. Keep it beside your recipe.
- Pistachio supplier and lot, peeled or skin-on.
- Kernel weight, roast setting and roast time.
- Grinder setting and finished paste weight.
- Paste percentage in the recipe and tasting result.
Store the paste in clean, dry, closed food containers. Label each with its batch and production date. Use smaller containers for daily work, keep utensils clean and dry, and follow your kitchen’s established refrigerated storage and use-by procedure.
Master or Master X for your kitchen
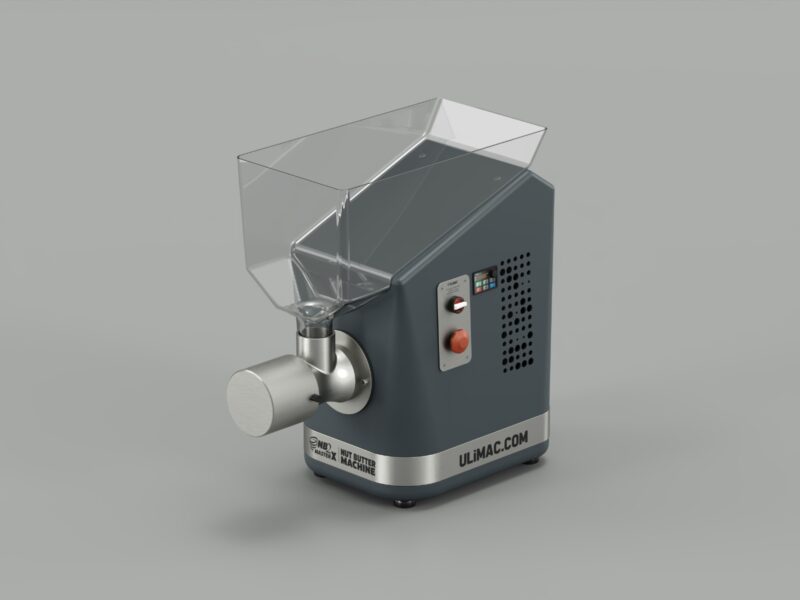
We build the Ulimac Master and Master X for applications including pistachio and almond paste. Both have stainless steel food-contact parts and an adjustable grinding texture.
For continuous, intensive production, we recommend the NB2 Master with a 380 V three-phase supply. For kitchens without three-phase electricity, the NB2 Master X runs on a 220 V single-phase supply. Its built-in drive provides speed and torque adjustment.
For the wider equipment comparison, read How to Choose a Commercial Nut Butter Grinder.
Does pure pistachio paste contain sugar?
Pure paste contains only pistachios. Add sugar as part of your gelato, cream or filling recipe.
Can I use the same paste for gelato and pastry?
Yes. Weigh it separately into each recipe and set the sweetness, firmness and pistachio level for that product.
Want a sweet spread instead? Turn this paste into pistachio cream: two starting recipes, batch tables up to 20 kg and tips for Dubai chocolate in our guide on how to make pistachio cream.
Make pistachio paste in your own kitchen
We manufacture Ulimac machines in Ankara and provide a two-year warranty. Send your country and electricity supply with your quote request for a Master or Master X.